Help wiring a 3 way switch
So, you want to add wiring a 3 way switch to your "handy-man tool belt", eh?
No problem, I can help you with that.
Three way switches have become very popular because it adds convenience and ease to lighting in large rooms, hallways and staircases. For more flexibility, add a four way switch.
I trust that you have already mastered how to wire a single pole light switch already so lets get right into it.
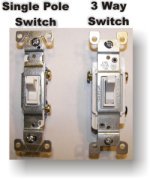
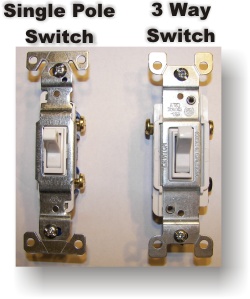
These switches are a bit more confusing and you may find yourself
getting a little frustrated... relax. Take your time, mark the wires properly and you will not only be successful, you will stay sane.
The first thing you will need to determine is where the power is coming from and where the switches are positioned.
I have a few examples below that should cover pretty much any situation.
Just click on the link to get a larger 3 way switch wiring diagram...
Wiring a 3 way switch
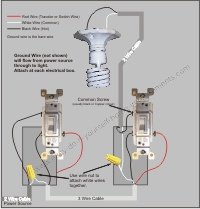
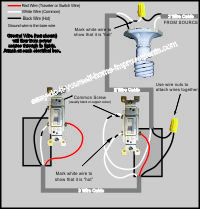
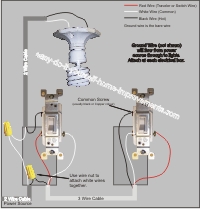
Option #1: Power to switch -- to switch -- to single light
In this first example, the power is coming in to the first switch, flowing along to the second switch and ends at the light. The ground wire will always be attached in each box and flow right to the end fixture.
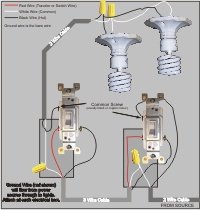
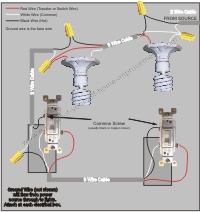
Option #2: Power to switch -- to switch -- to light -- to light
This option is very similar to option #1 when wiring a 3 way switch. Here I am showing how to hook some lights up in series. If you need more than two lights, just keep pig-tailing the white and black wires to keep the circuit going.
A comment from a fellow handyman
I can wire 110/220. Just that 3 way switches are a pain in the neck, especially when someone pre-wired but did no finish work, dry wall was installed and the electrician never came back, leaving this owner to hunt down every power leg and determine where every run went.
Your page saved me days of frustration.
A phenomenal effort on your part!" Todd - United States
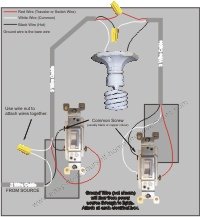
Option #3: Power to switch -- to light -- to switch
This may be one of the most common way to wire a 3 way switch. Think of your staircase or hallway. Light switch at one end, lights in the middle, light switch at the other end. Trace the wires carefully in the diagram so you can connect them to the proper locations.
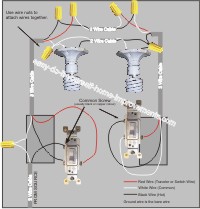
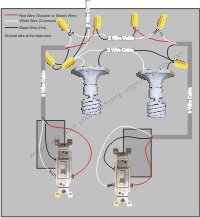
Option #4: Power to switch -- to light -- to light -- to switch
Similar to option #3 but with a series of lights in the middle of two 3 way switches. Note there are slight differences with the wiring at the light fixtures.
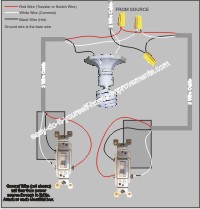
Option #5: Power to light -- to switch -- to switch
Wiring a 3 way switch with the power coming in through the light and flowing to the switches.
Be sure to mark the white wire as noted so if any future repairs or replacement is needed, whoever goes into the box will know it is marked as a hot wire.
Option #6: Power to light -- to light -- to switch -- to switch
Same scenario as option #5 but with multiple light fixtures.
The white wire coming from the second or last light will be marked "hot" with black electrical tape. This way, all the wires can be used with no waste.
Option #7: Power to light -- splits to switch and to light -- light to switch
This scenario gets a little tricky.
When wiring a 3 way switch in this fashion, the lights can be controlled by two switches and the double run of 14/2 wire between the lights ensures that if one bulb goes out, they all don't.
Option #8: Power to light -- splits to two 3 way switches
Here is another example of wiring a 3 way switch with the power coming from the fixture. I is similar to Option #3 only with the power coming into the light fixture.
This option is helpful if you are adding a light to an existing building and it is easier to drop all the lines down from an attic instead of trying to get wiring up from a finished basement or trying to fish wire up two stories.
Option #9: Power to switch -- splits to switch and to light
In this scenario the power comes into one of the 3 way switches. It then splits to a light fixture and another 3 way.
Keep in mind that the maximum allowable wires in a standard size electrical box is five (5). In this option you will have seven (7) wires in the first box. Not to worry, you can purchase and oversize receptacle box just for such an occasion.
Hey, doing it yourself is great but if you are unsure of the advice given or the methods in which to job is done... don't do it. This site is merely a collection of how some people do home improvements. There is no way we can anticipate every situation and we do our best to inform of any risks for each job. Be sure to check local building codes for proper installation and permits.
If in doubt, hire it out.
Visitor's Favorite Pages
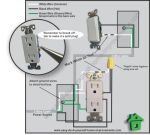
How to wire a split receptacle
Questions or Comments?
Contact Us and let us know what is on your mind!
